Friday 26 April 2013

Expandable Recent Comments Widget for Blogger/Blogspot

The Expandable Recent Comments widget for Blogger is a very accessible widget that can be collapsed or expanded through user interaction, so we don't have to click the author's name or post title link in order to read the content of a comment. The expanding content can be shown or hidden by clicking the plus/minus icon or by hitting the "Show all" or "Hide all" button.

recent comments widget, blogger gadgets, blogspot tricks

To add the Expandable Recent Comments widget for Blogger, please follow the next steps below:

Adding Expandable Recent Comments Widget to Blogger

1. From your Blogger dashboard, go to "Layout", then click on "Add a Gadget" link:


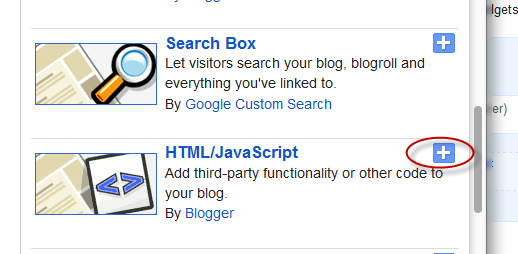
2. When the pop-up window appears, scroll down and select the "HTML/JavaScript" widget:


3. Copy and paste this code inside the empty box:
<style type="text/css">.row-div {margin-bottom:10px;}.comment-header {margin:10px 0;}.comment-box{margin:0px;padding:0px;font-size:0.9em;height:330px;overflow:auto;}.comments1{padding:3px;border-left:1px dashed #A6A6A6;color: #888888;font-style: italic;padding:0px 10px 10px 10px;margin-bottom:10px;}
</style>
<div style="text-align: center" class="comment-header"><input class="comment-button" id="commshowall" type="button" onclick="if (this.value == &#39;Show all&#39;) { unfold_all(this); this.value=&#39;Hide all&#39;; } else { fold_all(this); this.value=&#39;Show all&#39;; }" value="Show all" /></div>
<div class="comment-box">
<script type="text/javascript">
var tgl=false;var title_arr=new Array();var arr=0;var err="[err]";var icon_expand="https://blogger.googleusercontent.com/img/b/R29vZ2xl/AVvXsEhFR32LY_DDS1Io28fwywtVBreAZt5mJ43U_00JMDmqNAw90-YiT0esDzBVLtzGjUzDG3BHQPHBegKaG-qE-3w6CQGApysqEXjRlhHsFyxwi4F-h3P8XmBjJQD6BrXwzoc3_746MxP87QSm/s1600/icon-plus.png";var icon_collapse="https://blogger.googleusercontent.com/img/b/R29vZ2xl/AVvXsEiMcXgiLgmLhBx5KrAVD5OFo44X5PiYuVP46j-oyv8ILIrMfsrOGH8KBqGyYL0Lon2nOim0Lj9ZuzSAOPaLGlra5aM47HmOHoiWRLltIVR7OWM2bW4ZcrkQL8UqrgWfB2LuywuIgP4Mzn2P/s1600/icon-minus+copy.png";var maxcomments=20;function real_posttitle(postid){for(var i=0;i<title_arr.length;i++){if(title_arr[i][0]==postid)return title_arr[i][1];}
return err;}
function showrecentposts(json){var numposts=999999;for(i=0;i<numposts;i++){var entry=json.feed.entry[i];var postid;var title;if(i==json.feed.entry.length)break;for(var k=0;k<200;k++){if(entry.link[k].rel=='self'){postid=entry.link[k].href;postid=postid.substr(postid.lastIndexOf("/")+1,100);}
if(entry.link[k].rel=='alternate'){title=entry.link[k].title;break;}}
title_arr[arr]=postid+"&#176;"+title;title_arr[arr]=title_arr[arr].split("&#176;");++arr;}}
function unfold(el){var comid=el.id.substr(8,10);if(el.src==icon_expand){el.src=icon_collapse;document.getElementById("com_id"+comid).style.display="block";}else{el.src=icon_expand;document.getElementById("com_id"+comid).style.display="none";}}
function unfold_all(el){try{for(var i=0;i<maxcomments;i++){document.getElementById("com_id"+i).style.display="block";document.getElementById("click_id"+i).src=icon_collapse;}}catch(e){;}
el.value='Show all';}
function fold_all(el){try{for(var i=0;i<maxcomments;i++){document.getElementById("com_id"+i).style.display="none";document.getElementById("click_id"+i).src=icon_expand;}}catch(e){;}
el.value='Hide all';}
function showrecentcomments(json){var numcomments=999999;var postid;var i=0;for(i=0;i<numcomments;i++){var entry=json.feed.entry[i];var alturl;var anonymous=false;if(i==json.feed.entry.length)break;for(var k=0;k<entry.link.length;k++){if(entry.link[k].rel=='self'){postid=entry.link[k].href.split("/");postid=postid[5];}
if(entry.link[k].rel=='alternate'){alturl=entry.link[k].href;break;}}
var postlink=alturl.split("#");postlink=postlink[0];var linktext=postlink.split("/");linktext=linktext[5];linktext=linktext.split(".html");linktext=linktext[0];var profilelink="";try{profilelink=entry.author[0].uri.$t;}catch(e)
{anonymous=true;};var posttitle=real_posttitle(postid);if(posttitle==err){posttitle=linktext.replace(/-/g," ");}
var commentdate=entry.published.$t;var cdyear=commentdate.substring(0,4);var cdmonth=commentdate.substring(5,7);var cdday=commentdate.substring(8,10);var ctime=commentdate.substr(11,5);var monthnames=new Array();monthnames[1]="january";monthnames[2]="february";monthnames[3]="march";monthnames[4]="april";monthnames[5]="may";monthnames[6]="june";monthnames[7]="july";monthnames[8]="august";monthnames[9]="september";monthnames[10]="october";monthnames[11]="november";monthnames[12]="december";if("content"in entry){var comment=entry.content.$t;}
else
if("summary"in entry){var comment=entry.summary.$t;}else var comment="";if(i<maxcomments){if(tgl){tgl=false;var cl="row-a";}else{tgl=true;var cl="row-b";}
document.write('<div class="'+cl+' row-div"><img id="click_id'+i);document.write('" style="cursor:pointer;" onclick="unfold(this);"');document.write('src="'+icon_expand+'" />&nbsp;');document.write('On '+cdday+' '+monthnames[parseInt(cdmonth,10)]+' '+cdyear);document.write(', at '+ctime+', ');if(anonymous==false){document.write('<a href="'+profilelink+'">'+entry.author[0].name.$t+'</a> ');}else{document.write(entry.author[0].name.$t+' ');}
document.write('commented on <a href="'+alturl+'">'+posttitle+'</a>');document.write('</div>');document.write('<div class="comments1" id="com_id'+i+'" style="display:none;">'+comment+'<\/div>');}}
document.getElementById("numcom").innerHTML=i;}
</script><script type="text/javascript"  src="http://helplogger.blogspot.com/feeds/posts/default?start-index=1&max-results=999999&alt=json-in-script&callback=showrecentposts"></script><script type="text/javascript"  src="http://helplogger.blogspot.com/feeds/comments/default?start-index=1&max-results=999999&alt=json-in-script&callback=showrecentcomments">
</script></div>

Note: Replace http://helplogger.blogspot.com with the URL address of your blog or site.

4. Save the expandable recent comments widget for Blogger / Blogspot by clicking on the 'Save' button... and you're done!

Saturday 13 April 2013

Create Horizontal Navigation Menu With Drop Down Submenus Using CSS

This drop down menu made with CSS only is a horizontal menu with sub-tabs and a rounded search bar on the right side. A menu like this can be handy for users who don't need complex menus or prefer not to use one that requires scripts and/or too many images. Also, the installation and customization is quite easy and, to top it off, it is quite functional.

To see this CSS drop down menu in action, please visit this demo blog

blogger menu, drop down menu, css menu

Before changing anything, if you are using a template available in Blogger Template Designer, then you should consider doing these changes in the template, otherwise the menu might not be displayed correctly:

From the Blogger Dashboard, go to Template and press the "Edit HTML" button:


Search using CTRL + F for the following line:

<b:section class='tabs' id='crosscol' maxwidgets='1' showaddelement='yes'>

Screenshot

Remove the code in red.
You may have many parts as the one in red, delete all you find.

....then find a similar annotation in your template:
/* Tabs
----------------------------------------------- */

Remove all the code you find after this annotation until you see the Headings part.

/* Tabs
----------------------------------------------- */
.tabs-outer {
overflow: hidden;
position: relative;
background: $(tabs.background.color) $(tabs.background.gradient) repeat scroll 0 0;
}

#layout .tabs-outer {
overflow: visible;
}

.tabs-cap-top, .tabs-cap-bottom {
position: absolute;
width: 100%;

border-top: 1px solid $(tabs.border.color);

}

.tabs-cap-bottom {
bottom: 0;
}

.tabs-inner .widget li a {
display: inline-block;

margin: 0;
padding: .6em 1.5em;

font: $(tabs.font);
color: $(tabs.text.color);

border-top: 1px solid $(tabs.border.color);
border-bottom: 1px solid $(tabs.border.color);
border-$startSide: 1px solid $(tabs.border.color);
}

.tabs-inner .widget li:last-child a {
border-$endSide: 1px solid $(tabs.border.color);
}

.tabs-inner .widget li.selected a, .tabs-inner .widget li a:hover {
background: $(tabs.selected.background.color) $(tabs.background.gradient) repeat-x scroll 0 -100px;
color: $(tabs.selected.text.color);
}

/* Headings
----------------------------------------------- */

Then add this to where the code has been removed (instead of the code in green):
#crosscol ul {z-index: 200; padding:0 !important;}
#crosscol li:hover {position:relative;}
#crosscol ul li {padding:0 !important;}
.tabs-outer {z-index:1;}
.tabs .widget ul, .tabs .widget ul {overflow: visible;}
After doing this, we can finally add our menu.

How To Add CSS Horizontal Drop Down Menu to Blogger

To add the CSS horizontal menu with submenus in your blog, follow the next steps:

Step 1. From "Template", go to "Edit HTML" and just above ]]></b:skin> paste the following CSS code:
/* Horizontal drop down menu
----------------------------------------------- */
#menuWrapper {
width:100%; /* Menu width */
height:35px;
padding-left:14px;
background:#333; /* Background color */
border-radius: 10px; 
}
.menu {
padding:0;
margin:0;
list-style:none;
height:35px;
position:relative;
z-index:5;
font-family:arial, verdana, sans-serif;
}
.menu li:hover li a {
background:none;
}
.menu li.top {display:block; float:left;}
.menu li a.top_link {
display:block;
float:left;
height:35px;
line-height:34px;
color:#ccc;
text-decoration:none;
font-family:"Verdana", sans-serif;
font-size:12px; /* Font size */
font-weight:bold;
padding:0 0 0 12px;
cursor:pointer;
}
.menu li a.top_link span {
float:left;
display:block;
padding:0 24px 0 12px;
height:35px;
}
.menu li a.top_link span.down {
float:left;
display:block;
padding:0 24px 0 12px;
height:35px;
}
.menu li a.top_link:hover, .menu li:hover > a.top_link {color:#fff; }
.menu li:hover {position:relative; z-index:2;}
.menu ul,
.menu li:hover ul ul,
.menu li:hover ul li:hover ul ul,
.menu li:hover ul li:hover ul li:hover ul ul,
.menu li:hover ul li:hover ul li:hover ul li:hover ul ul
{position:absolute; left:-9999px; top:-9999px; width:0; height:0; margin:0; padding:0; list-style:none;}

.menu li:hover ul.sub {
left:0;
top:35px;
background:#333; /* Submenu background color */
padding:3px;
white-space:nowrap;
width:200px;
height:auto;
z-index:3;
}
.menu li:hover ul.sub li {
display:block;
height:30px;
position:relative;
float:left;
width:200px;
font-weight:normal;
}
.menu li:hover ul.sub li a{
display:block;
height:30px;
width:200px;
line-height:30px;
text-indent:5px;
color:#ccc;
text-decoration:none;
}
.menu li ul.sub li a.fly {
/* Submenu Background Color */
background:#333 url(https://blogger.googleusercontent.com/img/b/R29vZ2xl/AVvXsEgkAK2taXX_RLm0ESJQRmRoOz-1KHSnRyVcwT8B3hUg9jN_c1BdV9JgdJV1bHAiIS1G13Pmew3EFzGxkFdr9EHHnR9XxJp2Rn1t1Iv-mZ4hnJxsmVSXL9aq_fu27W908n3xlIyB-2qcID0/s1600/arrow_over.gif) 185px 10px no-repeat;}
.menu li:hover ul.sub li a:hover {
background:#515151; /* Background Color on mouseover */
color:#fff;
}
.menu li:hover ul.sub li a.fly:hover, .menu li:hover ul li:hover > a.fly {
/* Background on Mouseover */
background:#646464 url(https://blogger.googleusercontent.com/img/b/R29vZ2xl/AVvXsEgkAK2taXX_RLm0ESJQRmRoOz-1KHSnRyVcwT8B3hUg9jN_c1BdV9JgdJV1bHAiIS1G13Pmew3EFzGxkFdr9EHHnR9XxJp2Rn1t1Iv-mZ4hnJxsmVSXL9aq_fu27W908n3xlIyB-2qcID0/s1600/arrow_over.gif) 185px 10px no-repeat; color:#fff;}

.menu li:hover ul li:hover ul,
.menu li:hover ul li:hover ul li:hover ul,
.menu li:hover ul li:hover ul li:hover ul li:hover ul,
.menu li:hover ul li:hover ul li:hover ul li:hover ul li:hover ul {
left:200px;
top:-4px;
background: #333; /* Background Color of the Submenu */
padding:3px;
white-space:nowrap;
width:200px;
z-index:4;
height:auto;
}
#search {
width: 228px; /* Width of the Search Box */
height: 50px;
float: right;
z-index: 2;
text-align: center;
margin-top: 5px;
margin-right: 6px;
/* Background of the Search Box */
background: url(https://blogger.googleusercontent.com/img/b/R29vZ2xl/AVvXsEgEFqVDk0UJqqjYpS-VxXt-cO0RuFX8TaBH3i6184FDdvoIJRTENSc4oCJH1PBbxjxZQxjgVnuvudjmLOmK8gKmEdp77CK2kw6Yv13wSIM_im78xzZzmOxWWjPYxYRzAS_um4LcIWbiL5o/s1600/searchBar1.png) no-repeat;
}
#search-box {
margin-top: 3px;
border:0px;
background: transparent;
text-align:center;
}


Screenshot
Step 2. After adding the code, click the "Save Template" button.

Step 3. Go to Layout > click on Add a Gadget link


Step 4. Choose "HTML/JavaScript" and paste the following HTML code inside the empty box:

<div id='menuWrapper'>
<ul class='menu'>
<li class='top'><a class='top_link' href='Link URL'><span>Title 1</span></a></li>

<li class='top'><a class='top_link' href='Link URL'><span class='down'>Title 2</span></a><ul class='sub'><li><a class='fly' href='Link URL'>Submenu 2.1</a><ul>
<li><a href='Link URL'>Submenu 2.1.1</a></li>
<li><a href='Link URL'>Submenu 2.1.2</a></li>
<li><a href='Link URL'>Submenu 2.1.3</a></li>
</ul>
</li>
<li class='mid'><a class='fly' href='Link URL'>Submenu 2.2</a>
<ul>
<li><a href='Link URL'>Submenu 2.2.1</a></li>
<li><a href='Link URL'>Submenu 2.2.2</a></li>
<li><a href='Link URL'>Submenu 2.2.3</a></li>
<li><a class='fly' href='Link URL'>Submenu 2.2.4</a>
<ul>
<li><a href='Link URL'>Submenu 2.2.4.1</a></li>
<li><a href='Link URL'>Submenu 2.2.4.2</a></li>
<li><a href='Link URL'>Submenu 2.2.4.3</a></li>
</ul>
</li>
<li><a href='Link URL'>Submenu 2.2.5</a></li>
<li><a class='fly' href='Link URL'>Submenu 2.2.6</a>
<ul>
<li><a href='Link URL'>Submenu 2.2.6.1</a></li>
<li><a href='Link URL'>Submenu 2.2.6.2</a></li>
</ul>
</li>
</ul>
</li>
<li><a href='Link URL'>Submenu 2.3</a></li>
<li><a href='Link URL'>Submenu 2.4</a></li>
<li><a href='Link URL'>Submenu 2.5</a></li>
</ul>
</li>

<li class='top'><a class='top_link' href='Link URL'><span class='down'>Title 3</span></a>
<ul class='sub'>
<li><a href='Link URL'>Submenu 3.1</a></li>
<li><a href='Link URL'>Submenu 3.2</a></li>
<li><a href='Link URL'>Submenu 3.3</a></li>
<li><a href='Link URL'>Submenu 3.4</a></li>
</ul>
</li>

<li class='top'><a class='top_link' href='Link URL'><span class='down'>Title 4</span></a>
<ul class='sub'>
<li><a href='Link URL'>Submenu 4.1</a></li>
<li><a class='fly' href='Link URL'>Submenu 4.2</a>
<ul>
<li><a href='Link URL'>Submenu 4.2.1</a></li>
<li><a href='Link URL'>Submenu 4.2.2</a></li>
<li><a href='Link URL'>Submenu 4.2.3</a></li>
<li><a href='Link URL'>Submenu 4.2.4</a></li>
<li><a href='Link URL'>Submenu 4.2.5</a></li>
<li><a href='Link URL'>Submenu 4.2.6</a></li>
</ul>
</li>
<li><a href='Link URL'>Submenu 4.3</a></li>
<li><a href='Link URL'>Submenu 4.4</a></li>
<li><a href='Link URL'>Submenu 4.5</a></li>
<li><a href='Link URL'>Submenu 4.6</a></li>
</ul>
</li>

<li class='top'><a class='top_link' href='Link URL'><span class='down'>Title 5</span></a>
<ul class='sub'>
<li><a href='Link URL'>Submenu 5.1</a></li>
<li><a href='Link URL'>Submenu 5.2</a></li>
<li><a href='Link URL'>Submenu 5.3</a></li>
</ul>
</li>


<!-- Search Bar -->
<li>
<form action='/search' id='search' method='get' name='searchForm' style='display:inline;'>
<input id='search-box' name='q' onblur='if (this.value == &quot;&quot;) this.value = &quot;Search here...&quot;;' onfocus='if (this.value == &quot;Search here...&quot;) this.value = &quot;&quot;;' size='28' type='text' value='Search here...'/></form>
</li>

</ul>
</div>

How to Customize the Navigation Menu

- replace the text in blue and red with your links and titles.
- if you need more tabs, then add a line like this just above <!-- Search Bar -->

<li class="top"><a href="Link URL" class="top_link"><span>Title</span></a></li>

- if you want to add a tab with sub-tabs, then add this code:

<li class="top"><a href="Link URL" class="top_link"><span class="down">Title</span></a>
<ul class="sub">
<li><a href="Link URL">Submenu Title</a></li>
</ul>
</li>

- and if you want one of the other sub-tabs have sub-tabs then remove a line like the one in orange and change it to a code like this:

<li><a href="Link URL" class="fly">Submenu Title</a>
<ul>
<li><a href="Link URL">Other Submenu</a></li>
</ul>
</li>

And that's it... Now "Save" your Widget and enjoy this new CSS drop down menu!

Friday 12 April 2013

How To Use The New Blogger HTML Editor

The Blogger template editor now includes a number of changes that seem interesting and make it much more friendly than it was.

To begin with, what we see now is all the template's code starting with numbered and colored lines showing us different code snippets: tags, variables, properties, etc.. depending on the HTML, CSS, JavaScript and even the language of Blogger - include, b:if and other occurrences.

blogger template, blogger tricks, blogger widgets

This is what any decent external editor does, but certainly, from now on it will be much easier to find that little bug that drives us crazy when we omit quotation marks or add one more semicolon. This also applies to CSS, which appears mostly in dark blue without distinguishing selectors and rules, but the rest is a major improvement.
Another great help are the numbers that appear in front of each fragment of code, so that we can easily pinpoint and correct errors of this type: "Error parsing XML, line 103, column 9: The element ... "

Using the New Blogger Template HTML Editor

When you want to search for a code in the HTML editor, click inside the editor and press CTRL + F on your keyboard, then enter what you want to find in the search box that appears inside the editor.


Finally, hit the "ENTER" button on your keyboard and it should take you to the requested code.

If you want to be taken to the section of code that belongs to a particular widget, just click on the Jump To Widget button at the top of the editor, choose the widget's name from the list and it will take you directly to that portion of code.


The CSS rules can be found folded at the top of the template, between <b:skin>...</b:skin> and <b:template-skin>...</b:template-skin> tags. To expand them, you have to click on the sideways arrow next to the line number.


Another great functionality is that now we can Preview Template in the same window without needing to leave the page and we can easily go back to customize our template by clicking on the Edit Template button.

Finally, Format template re-orders the code, adding indentation automatically.

As always, we must use the Save button for the changes to take effect or we can Revert the changes.

And that's it. With a bit of effort, we can easily familiarize with this new HTML editor. Surely as usual and even reasonable to be something inherent in the human condition, this change does not appeal to many. Same with the Lightbox for images, the new template designer, the new desktop and other new things that have been added in the past. But who now remembers that they once were new?
----------
For more info, check out this post on the Blogger Buzz blog, where Google software engineers +Samantha Schaffer and +Renee Kwang explained the steps for moving the date of a blog post from above the post title to underneath it, as an example in using the new Blogspot HTML editor.

Monday 1 April 2013

Show Recent Posts With Thumbnails For Particular Label or Category in Blogger

Sometimes we want to have everything organized, so that our readers can find topics of interest more easily. To accomplish this, instead of putting a widget with the latest posts, we can put together the latest entries sorted by category, so that we'll be able to show the latest posts for each label we want and also display a thumbnail for our category.

recent posts by labels

To add this recent posts widget for labels or categories in a Blogger blog, follow the next steps:

Recent Posts with Thumbnails Sorted by Labels

Step 1. From your Blogger Dashboard, go to 'Template' and click the 'Edit HTML' button


Step 2. Click anywhere inside the code area and search (CTRL + F) for this piece of code:
]]></b:skin>

Just above ]]></b:skin>, paste this CSS style:
/* Recent posts by labels
--------------------------------- */
img.label_thumb{
float:left;
margin-right:10px !important;
height:65px; /* Thumbnail height */
width:65px; /* Thumbnail width */
border: 1px solid #fff;
-webkit-border-radius: 10px;
-moz-border-radius: 10px;
border-radius: 10px;
-webkit-box-shadow: 0 1px 1px rgba(0, 0, 0, .4);
-moz-box-shadow: 0 1px 1px rgba(0, 0, 0, .4);
box-shadow: 0 1px 1px rgba(0, 0, 0, .4);
}

#label_with_thumbs {
float: left;
width: 100%;
min-height: 70px;
margin: 0px 10px 2px 0px;
padding: 0;
}
ul#label_with_thumbs li {
padding:8px 0;
min-height:65px;
margin-bottom:0px;
border-bottom: 1px dotted #999999;
}

#label_with_thumbs li{
list-style: none ;
padding-left:0px !important;
}

#label_with_thumbs a { text-transform: uppercase;}
#label_with_thumbs strong {padding-left:0px; }
Step 3. Now try to find this tag:
</head>
... just above </head> add this script:
<script type='text/javascript'>
//<![CDATA[
function labelthumbs(json){document.write('<ul id="label_with_thumbs">');for(var i=0;i<numposts;i++){var entry=json.feed.entry[i];var posttitle=entry.title.$t;var posturl;if(i==json.feed.entry.length)break;for(var k=0;k<entry.link.length;k++){if(entry.link[k].rel=='replies'&&entry.link[k].type=='text/html'){var commenttext=entry.link[k].title;var commenturl=entry.link[k].href;}
if(entry.link[k].rel=='alternate'){posturl=entry.link[k].href;break;}}var thumburl;try{thumburl=entry.media$thumbnail.url;}catch(error)
{s=entry.content.$t;a=s.indexOf("<img");b=s.indexOf("src=\"",a);c=s.indexOf("\"",b+5);d=s.substr(b+5,c-b-5);if((a!=-1)&&(b!=-1)&&(c!=-1)&&(d!="")){thumburl=d;}else thumburl='https://blogger.googleusercontent.com/img/b/R29vZ2xl/AVvXsEjfIgnSq1UpYlVpoInNZacCe-fNNKxiQM2nSqC468Os-Goi-CZMDXl2C83pXe0ohglAdWdICoSkwBInpQ3o7ESoK5iIZy33iy6jPXHD_-M9go-lyjP3_G6v4alNAbARzpOycPdgFaJabIw/s1600/picture_not_available.png';}
var postdate=entry.published.$t;var cdyear=postdate.substring(0,4);var cdmonth=postdate.substring(5,7);var cdday=postdate.substring(8,10);var monthnames=new Array();monthnames[1]="Jan";monthnames[2]="Feb";monthnames[3]="Mar";monthnames[4]="Apr";monthnames[5]="May";monthnames[6]="June";monthnames[7]="July";monthnames[8]="Aug";monthnames[9]="Sept";monthnames[10]="Oct";monthnames[11]="Nov";monthnames[12]="Dec";document.write('<li class="clearfix">');if(showpostthumbnails==true)
document.write('<a href="'+posturl+'" target ="_top"><img class="label_thumb" src="'+thumburl+'"/></a>');document.write('<strong><a href="'+posturl+'" target ="_top">'+posttitle+'</a></strong><br>');if("content"in entry){var postcontent=entry.content.$t;}
else
if("summary"in entry){var postcontent=entry.summary.$t;}
else var postcontent="";var re=/<\S[^>]*>/g;postcontent=postcontent.replace(re,"");if(showpostsummary==true){if(postcontent.length<numchars){document.write('');document.write(postcontent);document.write('');}
else{document.write('');postcontent=postcontent.substring(0,numchars);var quoteEnd=postcontent.lastIndexOf(" ");postcontent=postcontent.substring(0,quoteEnd);document.write(postcontent+'...');document.write('');}}
var towrite='';var flag=0;document.write('<br>');if(showpostdate==true){towrite=towrite+monthnames[parseInt(cdmonth,10)]+'-'+cdday+' - '+cdyear;flag=1;}
if(showcommentnum==true)
{if(flag==1){towrite=towrite+' | ';}
if(commenttext=='1 Comments')commenttext='1 Comment';if(commenttext=='0 Comments')commenttext='No Comments';commenttext='<a href="'+commenturl+'" target ="_top">'+commenttext+'</a>';towrite=towrite+commenttext;flag=1;;}
if(displaymore==true)
{if(flag==1)towrite=towrite+' | ';towrite=towrite+'<a href="'+posturl+'" class="url" target ="_top">More �</a>';flag=1;;}
document.write(towrite);document.write('</li>');if(displayseparator==true)
if(i!=(numposts-1))
document.write('');}document.write('</ul>');}
//]]>
</script>
Note: to add your own pic for the posts with no thumbnail, replace the image url in blue with your own

Update! For a better image resolution add this script above the </body> tag:
<script type='text/javascript'>                  
function changeThumbSize(id,size){
var blogGadget = document.getElementById(id);
var replacement = blogGadget.innerHTML;
blogGadget.innerHTML = replacement.replace(/s72-c/g,"s"+size+"-c");
var thumbnails = blogGadget.getElementsByTagName("img");
for(var i=0;i&lt;thumbnails.length;i++){
thumbnails[i].width = size;
thumbnails[i].height = size;
}
}
changeThumbSize("label_with_thumbs",210);             
</script>
Now Save the template to finish with your changes.

So, what we have added, is the CSS to style the widget and the script to make it work. Now all we have to do is to add the widget's code to the blog sidebar in a HTML/JavaScript gadget:

Step 4. Go to Layout - click on Add a Gadget

blogger layout, add a gadget

Step 5. From the pop-up window, choose the HTML/Javascript widget and paste this script inside the empty box:
<script type='text/javascript'>var numposts = 3;var showpostthumbnails = true;var displaymore = false;var displayseparator = true;var showcommentnum = false;var showpostdate = false;var showpostsummary = true;var numchars = 100;</script>
<script type="text/javascript" src="/feeds/posts/default/-/Name-of-the-label?published&alt=json-in-script&callback=labelthumbs"></script>

Note: Where it says Name-of-the-label should be the name of the label that you want to display, and if your label is case sensitive, like in my example, then you should type it that way.

Within the last code, there are these parts which can be customized - change true with false or vice versa:
var numposts ? Number of posts to display
var showpostthumbnails ? Show/hide thumbnails
var displaymore ? Show or hide the read more link
var displayseparator ? Show/hide separator
var showcommentnum ? Show/hide the number of comments
var showpostdate ? Show/hide the posts dates
var showpostsummary ? Show or not the posts summaries
var numchars ? Number of posts characters (here you have to change the 100 value)
Remember that the gadget displays the latest posts from a particular label... therefore, if you want to display the latest posts from other labels, repeat step 5 for each additional category that you want to add.

That's it :) Enjoy!